Remember that time you were cruising down the Pacific Coast Highway, the sun on your face and the wind in your hair, only to be jolted by your travel trailer swaying precariously in the wind? A swaying trailer can be a recipe for disaster, turning your dream road trip into a stressful ordeal. But fear not, fellow adventurers, for the solution lies in a simple yet effective piece of equipment: sway bars.
What are Travel Trailer Sway Bars and Why Do You Need Them?
Imagine navigating the windy roads leading up to Mount Rushmore with a trailer in tow. Without sway bars, your trailer might start swaying back and forth, especially in strong crosswinds or when passing large vehicles. This unsettling movement isn’t just uncomfortable; it can quickly escalate into a dangerous situation, leading to loss of control.
Travel trailer sway bars act as your co-pilot on the road, working tirelessly to combat this unwanted movement. These ingenious bars connect your trailer frame to your tow vehicle, providing an additional layer of stability and significantly reducing sway. Think of them as the unsung heroes of your road trip, ensuring a smoother, safer, and more enjoyable journey.
Types of Travel Trailer Sway Bars
Just like choosing the right hiking boots for a trek through Yosemite, selecting the right sway bar for your travel trailer is crucial. There are two main types to consider:
1. Friction Sway Bars: These workhorse bars use friction to counteract sway. They’re a reliable and budget-friendly option, perfect for those weekend getaways to scenic spots like Lake Tahoe.
2. Weight Distribution Hitch with Sway Control: For the avid RVer planning an epic cross-country adventure, perhaps following Route 66, this type is your best bet. It not only controls sway but also distributes weight more evenly between your trailer and tow vehicle, improving overall stability and handling.
How To Install Travel Trailer Sway Bars: A Step-by-Step Guide
Installing sway bars might seem daunting at first, but it’s a task any DIY enthusiast can handle. Here’s a detailed guide to walk you through the process:
1. Gather Your Tools and Materials
Just as a seasoned chef preps their ingredients before embarking on a culinary masterpiece, gathering the necessary tools is the first step to a successful sway bar installation. You’ll need:
- Your chosen sway bar kit
- Wrench set
- Torque wrench
- Socket set
- Drill with drill bits (if necessary for your specific model)
- Measuring tape
- Level
2. Prepare Your Trailer and Tow Vehicle
Before you begin, park your trailer and tow vehicle on a level surface, ensuring the trailer is properly hitched. Engage the parking brake on both vehicles and chock the trailer wheels for added safety. Remember, safety is paramount when working with your travel companions.
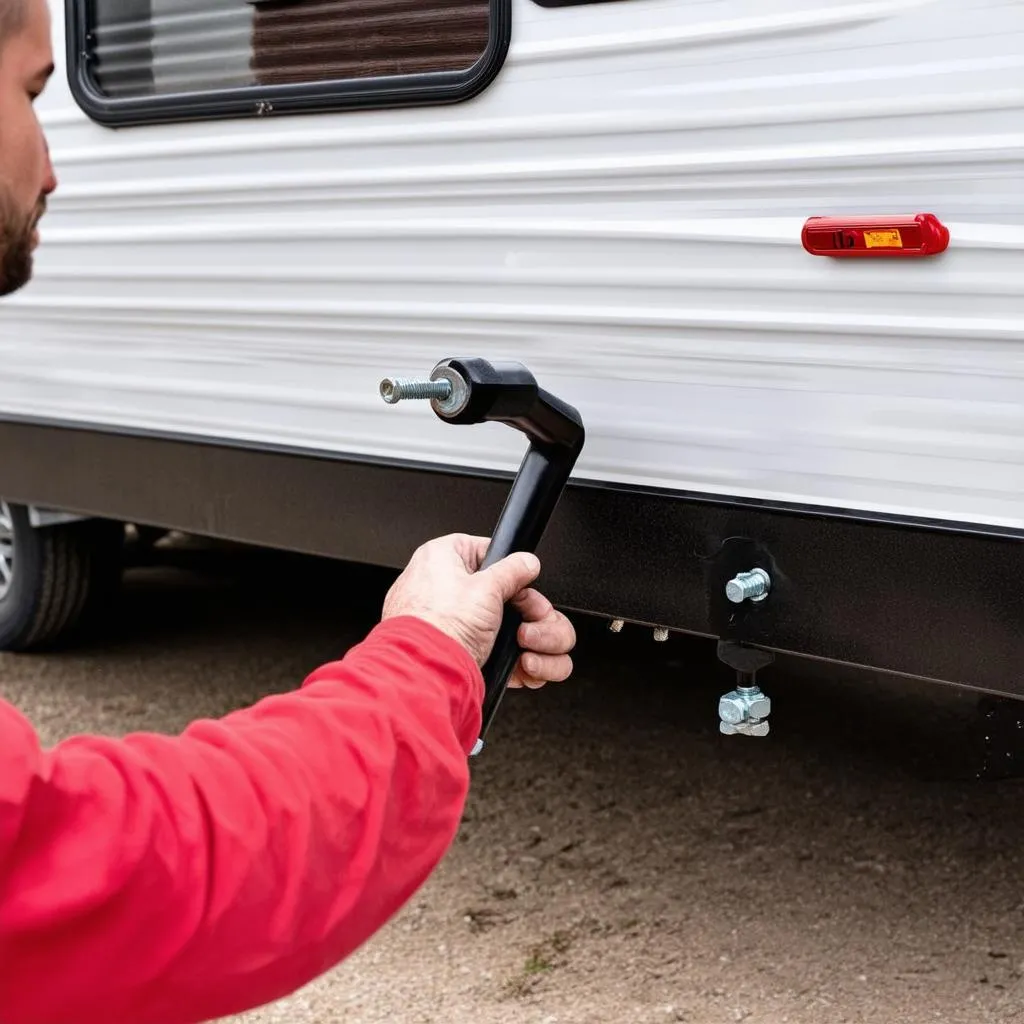
3. Install the Sway Bar Brackets
The sway bar brackets are the anchors that secure the sway bar to your trailer frame. Depending on your specific sway bar kit, you might need to drill holes in the trailer frame for installation. Always refer to the manufacturer’s instructions for precise guidance.
4. Attach the Sway Bar Arms
Once the brackets are securely in place, attach the sway bar arms. These arms connect to the brackets and hold the sway bar itself. Ensure the arms are level and properly aligned before tightening the bolts.
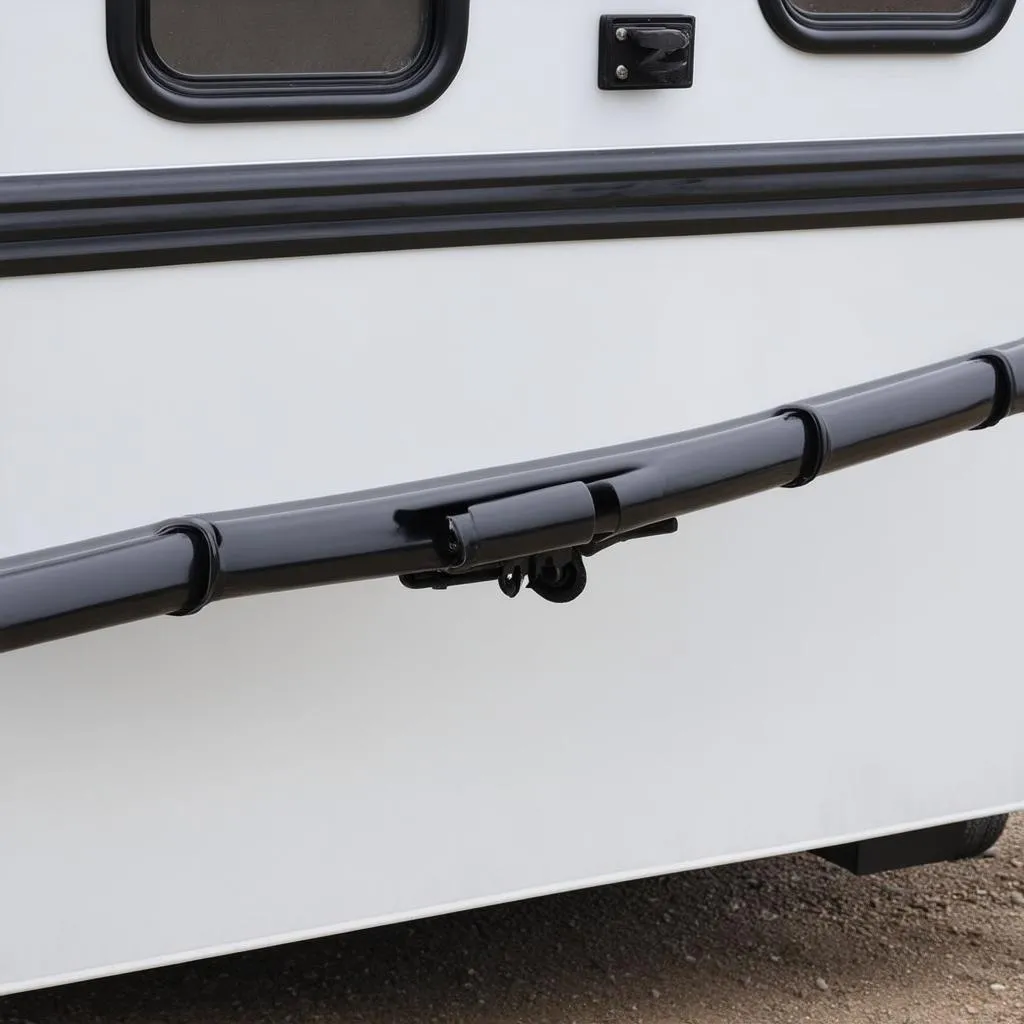
5. Connect the Sway Bar to the Tow Vehicle
The final step involves connecting the sway bar to your tow vehicle’s hitch. This connection point allows the sway bar to effectively counteract any swaying motion. Again, refer to your specific sway bar kit instructions for proper connection procedures.
6. Tighten All Bolts and Test Your Setup
After installation, double-check that all bolts are tightened to the manufacturer’s specifications using a torque wrench. Once everything is secure, take your trailer for a test drive, preferably on an open road with minimal traffic. Observe how the trailer handles, especially around curves and at higher speeds.
 Installing a Sway Bar
Choosing the Right Sway Bar for Your Travel Trailer
Selecting the appropriate sway bar is crucial for optimal performance and safety. Consider these factors when making your decision:
– Trailer Weight and Size: Heavier trailers require more robust sway bars for effective control.
– Towing Frequency and Distance: Frequent towers and those embarking on long journeys might benefit from weight distribution hitches with sway control.
– Driving Conditions: If you frequently encounter strong winds or navigate winding roads, a more heavy-duty sway bar is advisable.
Tips for Maintaining Your Sway Bars
Just like your trusty compass guiding you on a hiking adventure, your sway bars require regular maintenance to ensure their longevity and effectiveness. Here are a few tips:
– Regular Inspection: Periodically inspect your sway bars for signs of wear and tear, such as rust, cracks, or loose bolts.
– Lubrication: Apply a suitable lubricant to the moving parts of your sway bars, such as the ball and socket connections, to prevent friction and premature wear.
– Professional Checkups: Consider having your sway bars professionally inspected annually, especially if you frequently tow heavy loads or travel long distances.
 Travel Trailer Sway Bars
FAQs about Travel Trailer Sway Bars
Do I need sway bars even if my travel trailer has electronic stability control?
While electronic stability control enhances safety, it doesn’t completely eliminate the need for sway bars. Sway bars provide an additional layer of mechanical stability, reducing sway before it becomes severe enough to trigger the electronic system.
Can I install sway bars myself, or do I need professional help?
Installing sway bars is a manageable DIY project for those comfortable with basic tools and mechanical tasks. However, if you’re unsure about any step, seeking professional assistance is always a wise choice.
How often should I replace my sway bars?
With proper maintenance, sway bars can last for several years. However, it’s best to replace them if you notice significant wear and tear, damage, or reduced effectiveness.
Conclusion
Installing sway bars on your travel trailer is a valuable investment in safety and peace of mind, transforming your road trips from bumpy rides to smooth sailing. By following this guide, you’ll be well-equipped to handle the installation process and enjoy countless miles of worry-free towing. Remember, your travel trailer is your home on wheels, and ensuring its stability is essential for creating lasting memories on the open road.
For more helpful tips and information on all things travel trailer-related, be sure to explore the wealth of resources available on travelcar.edu.vn. Safe travels!