Ever feel like your garage door is putting on a magic show, disappearing into the ceiling or stopping short like a hesitant tourist at a crosswalk in Rome? That, my friend, is a sign you need to adjust your garage door travel. Don’t worry, it’s not as complicated as navigating the winding streets of Venice. This guide will walk you through the process, making it smoother than a gondola ride on a Venetian canal.
Understanding Garage Door Travel
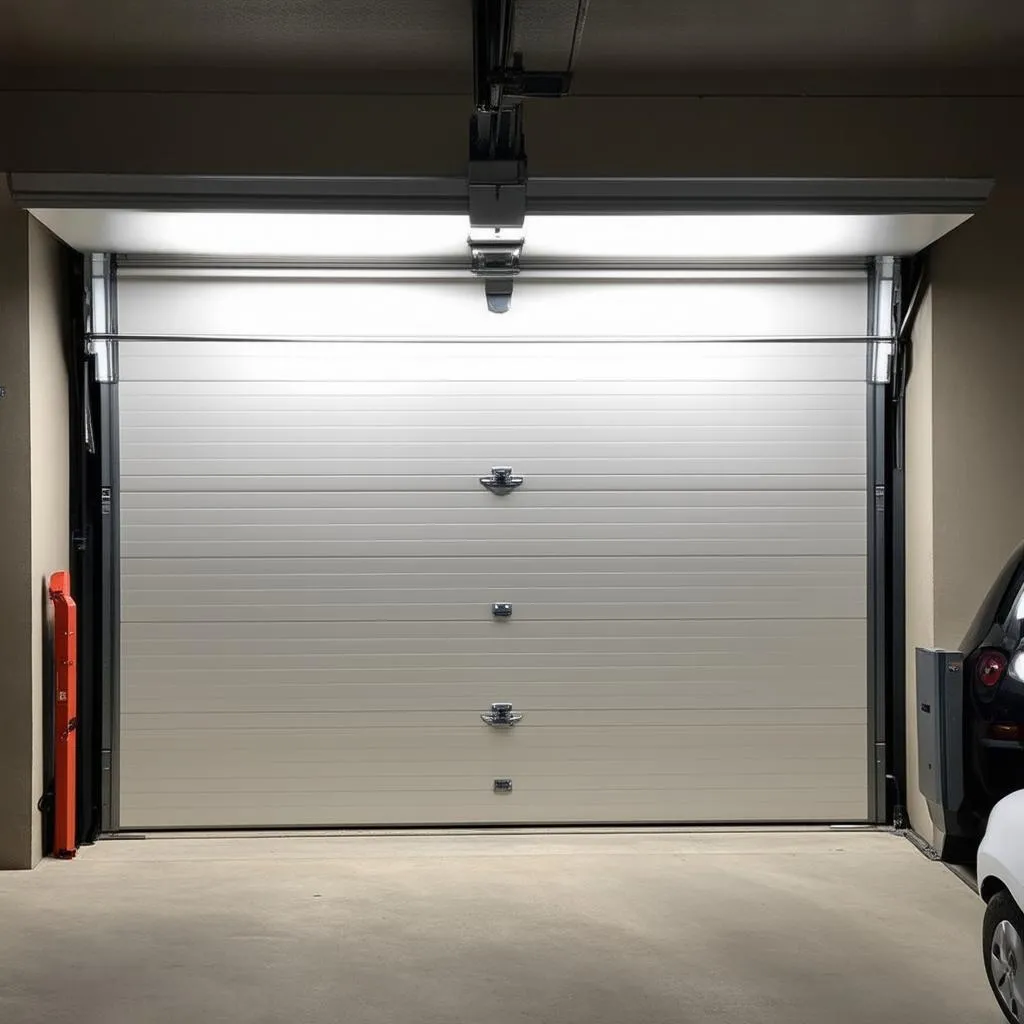
Before we embark on our adjustment journey, let’s unpack what “garage door travel” actually means. Simply put, it refers to how far your garage door opens and closes. When properly adjusted, your door should open fully without hitting the ceiling and close completely, sealing your garage like a hidden speakeasy in 1920s Chicago.
Why Adjusting Garage Door Travel Matters
Picture this: You’re returning from a rejuvenating trip to Sedona, Arizona, inspired by the red rock energy. You press the button on your garage door opener, expecting a smooth welcome. Instead, your door crashes into the ceiling, leaving you with a dent and a serious case of travel-ruined zen.
Adjusting your garage door travel prevents such mishaps and ensures:
- Safety: A misaligned door can cause damage and pose a safety hazard.
- Security: A door that doesn’t close properly compromises the security of your belongings.
- Longevity: Proper adjustment reduces wear and tear on your garage door system.
How To Adjust Garage Door Travel: A DIY Approach
Now, for the main event. Here’s a step-by-step guide to adjusting your garage door travel, as easy to follow as a map of Central Park:
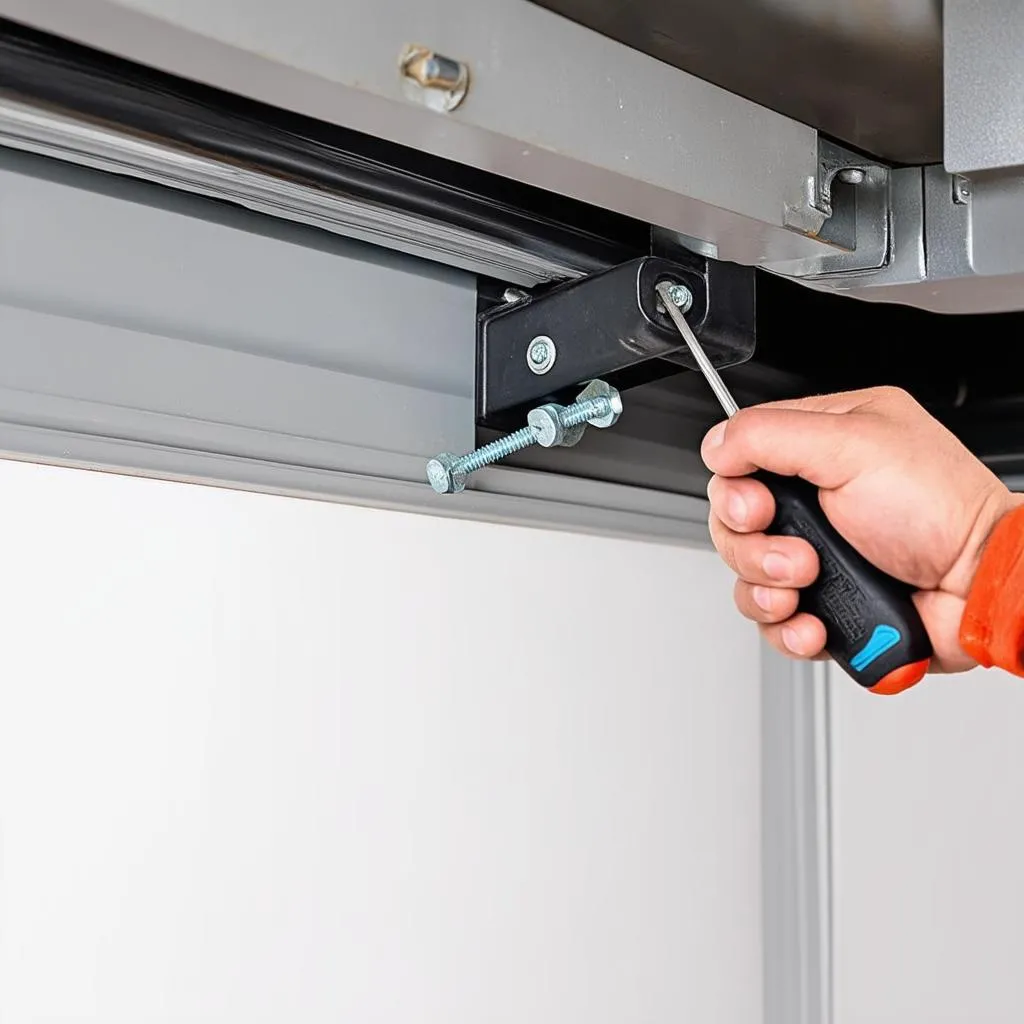
1. Identify the Adjustment Screws
Most garage door openers have two adjustment screws labeled “Up” and “Down.” They control the open and close limits of your door. Think of them as the compass guiding your garage door on its journey.
2. Adjust the “Down” Limit
To adjust the down limit, follow these steps:
- Close the garage door completely.
- Locate the “Down” adjustment screw.
- Turn the screw clockwise to decrease the closing distance and counterclockwise to increase it.
- Test the door after each adjustment, making small increments until it closes completely without hitting the ground.
3. Adjust the “Up” Limit
Now, let’s set the stage for a grand opening:
- Open the garage door fully.
- Locate the “Up” adjustment screw.
- Turn the screw clockwise to decrease the opening distance and counterclockwise to increase it.
- Test the door after each adjustment until it opens fully without touching the ceiling.
4. Fine-Tuning
Once you’ve adjusted both limits, test the door several times to ensure smooth operation. It should open and close effortlessly, like gliding through TSA PreCheck after a long international flight.
Garage Door Travel Adjustment: FAQs
Here are some common questions about adjusting garage door travel, answered:
Q: How often should I adjust my garage door travel?
A: It’s generally recommended to check and adjust your garage door travel at least once a year. However, if you notice any changes in your door’s operation, adjust it sooner.
Q: Can I adjust the travel on any garage door opener?
A: Most garage door openers have similar adjustment procedures. However, it’s always a good idea to consult your owner’s manual for specific instructions.
Travelcar.edu.vn: Your Guide to Seamless Journeys
Just as we’ve guided you through adjusting your garage door travel, Travelcar.edu.vn is your trusted companion for all things travel. We provide resources, tips, and inspiration to make your journeys, both near and far, as smooth and enjoyable as possible.
Explore our website for more travel-related insights and embark on your next adventure with confidence!
 Garage Door Limit Adjustment
 Smooth Garage Door Operation