Remember that time you were rushing to catch a flight from JFK, bags packed with souvenirs from your trip to the Grand Canyon, but your garage door decided to play a trick on you? It refused to close completely, leaving you in a frenzy. We’ve all been there. Adjusting your garage door’s travel limits might seem like a job for a professional, but trust me, it’s a task you can easily handle yourself! This guide will walk you through the steps to ensure your garage door opens and closes smoothly, just like navigating the canals of Venice on a gondola.
Understanding Garage Door Travel Limits
Before we dive into the how-to, let’s understand what “travel limits” actually mean. Imagine your garage door as a traveler on a journey. The travel limits are like the start and finish lines of this journey, telling the door when to stop when opening and closing. If these limits are off, your door might stop too high, too low, or even worse, bounce back when hitting the floor.
Tools You’ll Need for this DIY Project:
- A sturdy ladder – remember, safety first, just like carrying a first-aid kit on a hiking trip!
- A screwdriver (usually a flathead or a star-shaped one, depending on your garage door model)
- Your garage door opener’s manual (consider it your travel guide for this project!)
- A keen eye for detail and a dash of patience – just like when you’re trying to capture the perfect sunset photo in Santorini!
Step-by-Step Guide to Adjust Garage Door Travel:
1. Locate the Adjustment Screws:
Most garage door openers have two adjustment screws, often labeled “Up” and “Down” or sometimes with arrows indicating the direction of adjustment. You’ll usually find these screws on the back or side of the motor unit. Think of it as finding those hidden gems in a new city – they’re there, you just need to know where to look!
2. Adjusting the “Up” Limit:
- Start with the “Up” limit. Close your garage door completely.
- Using your screwdriver, turn the “Up” screw slowly (usually clockwise to increase the distance).
- Keep testing the door after each small adjustment. Remember the slow and steady pace of a camel ride through the Sahara Desert – it’s about getting there safely and smoothly.
- Continue adjusting until the door reaches your desired open position.
3. Adjusting the “Down” Limit:
- Now for the “Down” limit. Open your garage door fully.
- Similarly, turn the “Down” screw (usually counter-clockwise to decrease the distance) gradually, testing the door after each adjustment.
- Continue until the door closes completely, resting gently on the ground without being too forceful. You want a gentle landing, like a hot air balloon gracefully touching down in Cappadocia.
4. Fine-tuning and Testing:
- Once you’re happy with the open and close positions, run the door through a few cycles to ensure it moves smoothly without any hitches. This is like confirming your itinerary before embarking on a cross-country road trip – better safe than sorry!
Troubleshooting Common Issues:
- Door Reverses Before Reaching the Floor: This could mean the “Down” limit is set too high. Try adjusting it slightly lower.
- Door Doesn’t Open Completely: Check if the “Up” limit is set too low. Adjust it higher in small increments.
- Door Opens or Closes Too Fast: This requires adjusting the force settings, which is usually done through separate screws on the motor unit. Refer to your manual for guidance.
A Word of Caution:
While adjusting travel limits is a DIY-friendly task, always prioritize safety. If you’re uncomfortable working with tools or your garage door opener is behaving erratically, it’s best to consult a professional technician.
Pro Tip:
Just like marking important locations on your travel map, note down the original positions of the adjustment screws before making any changes. This way, you can always revert to the default settings if needed.
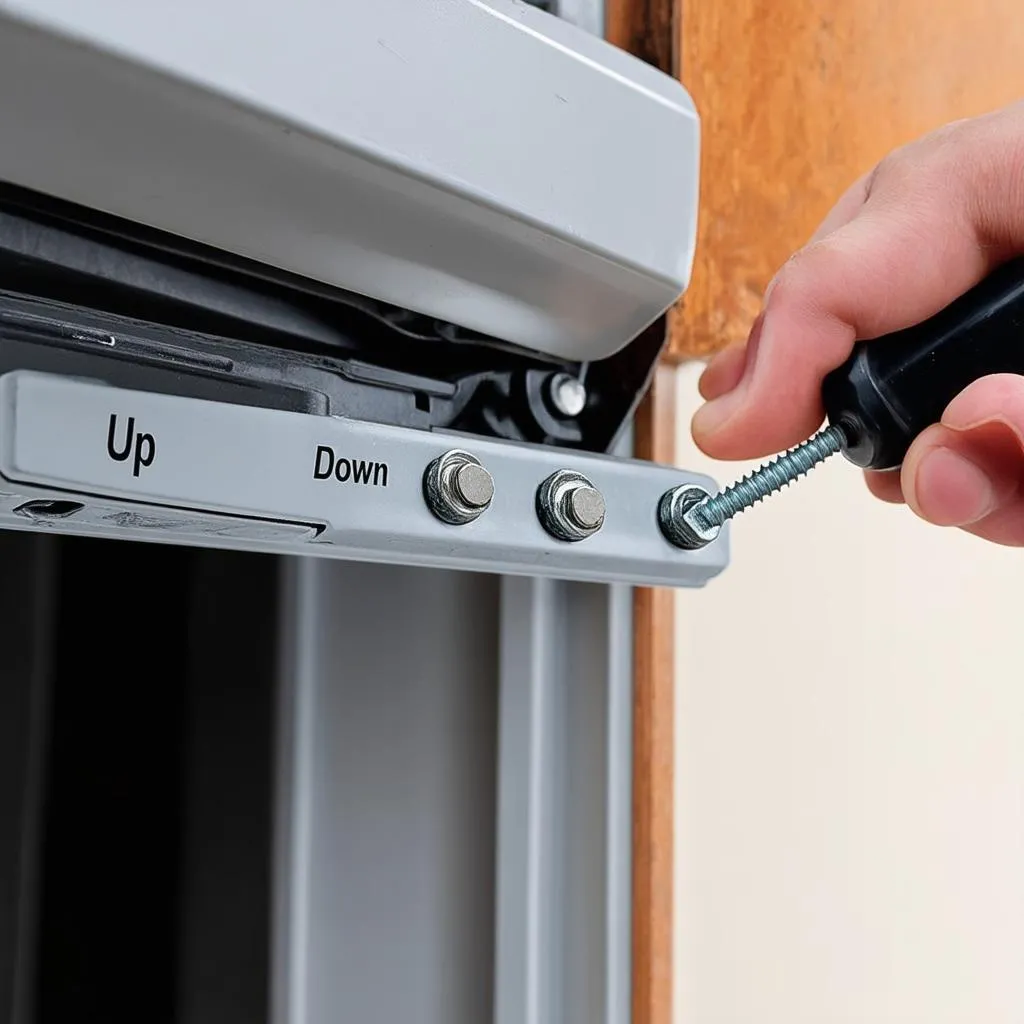 Garage Door Adjustment Screws
FAQs:
1. How often should I adjust my garage door travel limits?
It’s a good practice to check and adjust the travel limits at least twice a year or whenever you notice any changes in your garage door’s operation. Just like you wouldn’t wait for your car to break down before servicing it, regular maintenance ensures a smooth experience.
2. Can I adjust the travel limits on any garage door opener?
Most modern garage door openers come with adjustable travel limits. However, the location and type of adjustment screws might vary depending on the brand and model. Always refer to your owner’s manual for specific instructions.
 Garage Door Opening Smoothly
Planning Your Next Adventure?
We hope this guide helps you master the art of adjusting your garage door travel limits. Now that your garage door is cooperating, you’re all set to embark on your next adventure! Speaking of adventures, if you’re seeking travel inspiration, be sure to check out travelcar.edu.vn for exciting itineraries and travel tips. From the bustling streets of Tokyo to the serene beaches of Bali, we’ve got you covered. Happy travels!