Picture this: you’re cruising down the Pacific Coast Highway, the sun is setting over the Pacific Ocean, and your favorite travel trailer is trailing behind you. Life is good! Suddenly, you feel a bump, and you hear that dreaded flapping sound. Flat tire. Don’t panic, every seasoned traveler has been there. Changing a tire on a travel trailer is a bit more challenging than changing a tire on your car, but with a little know-how, you’ll be back on the road in no time.
Understanding Your Travel Trailer Tire
Before we dive into the nitty-gritty, let’s get familiar with your travel trailer tire. Unlike your car, your trailer likely has a heavier-duty tire, often with a higher tire pressure. Always consult your owner’s manual for the recommended tire pressure and weight limit.
What You’ll Need
Having the right tools is half the battle won. Here’s what you need:
- A sturdy jack: Your car jack might not cut it. Invest in a bottle jack or a floor jack with a high enough weight capacity for your trailer.
- Lug wrench: Make sure it fits your trailer’s lug nuts.
- Tire chocks: These are crucial for preventing your trailer from rolling while you’re working.
- A piece of wood: This provides a stable base for your jack on soft surfaces.
- Your spare tire: It seems obvious, but double-check that your spare tire is in good condition and properly inflated.
- Gloves and safety glasses: Safety first!
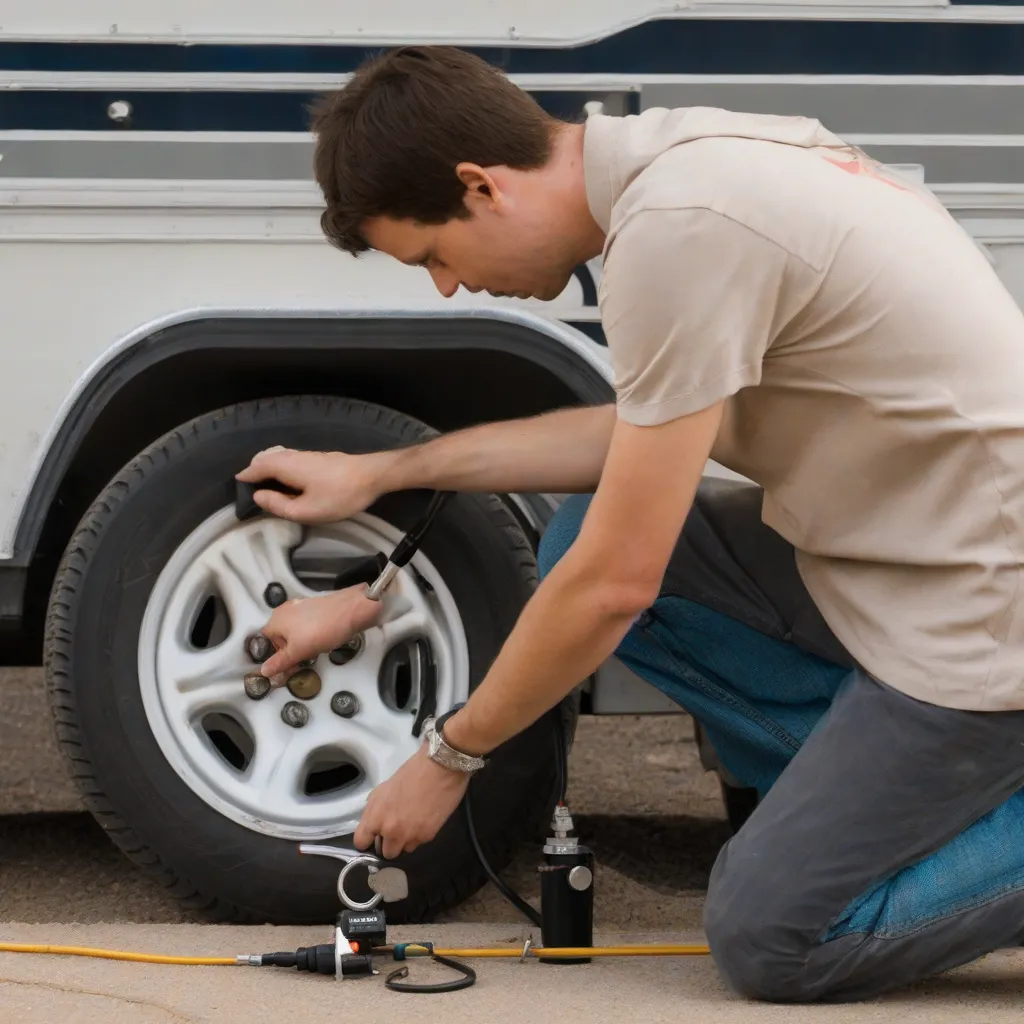
Step-by-Step Guide to Changing Your Tire
Find a Safe and Level Spot: Safety is paramount. Pull over on a level, solid surface as far away from traffic as possible. Engage your parking brake and turn on your hazard lights.
Chock Your Wheels: Place chocks behind the wheel opposite the flat tire to prevent any unwanted movement.
Locate Your Jack Point: Consult your owner’s manual to locate the designated jack point for your specific trailer. It’s usually a reinforced metal frame rail near the flat tire.
Position Your Jack and Wood: Place the wood block under the jack to create a stable base, especially on soft ground. Slowly raise the jack until it makes contact with the jack point, but don’t lift the trailer yet.
Loosen the Lug Nuts: Using your lug wrench, loosen the lug nuts on the flat tire by turning them counterclockwise. Don’t remove them completely yet.
Raise the Trailer: Now, use the jack to raise the trailer until the flat tire is completely off the ground.
Remove the Lug Nuts and Tire: Fully unscrew the lug nuts and carefully remove the flat tire.
Mount the Spare Tire: Align the spare tire with the wheel studs and carefully lift it onto the hub.
Hand-Tighten the Lug Nuts: Put the lug nuts back on and tighten them by hand, turning clockwise.
Lower the Trailer Slightly: Use the jack to lower the trailer until the spare tire touches the ground, but don’t put all the weight on it yet.
Tighten the Lug Nuts with the Wrench: Use the lug wrench to tighten the lug nuts in a star pattern. This ensures even pressure distribution.
Lower the Trailer Completely: Carefully lower the trailer all the way down.
Double-Check the Lug Nuts: Give the lug nuts one final check to make sure they’re securely tightened.
Stow Your Equipment and Flat Tire: Stow your flat tire, jack, and other tools securely.
Check Your Tire Pressure: As soon as possible, inflate your spare tire to the correct pressure. You can find this information in your owner’s manual or on the tire sidewall.
 Changing a Tire on a Travel Trailer
Important Tips and Precautions
- Consult a Professional If Needed: If you’re ever unsure about any step of the process, don’t hesitate to call for roadside assistance or consult a professional mechanic.
- Regularly Inspect Your Tires: Before each trip, inspect your tires for signs of wear and tear, like cracks, bulges, or uneven tread wear. Maintaining proper tire pressure is crucial for safety and fuel efficiency.
- Practice Makes Perfect: If you’re new to changing tires, consider practicing in your driveway a few times before hitting the open road. This way, you’ll be familiar with the process and feel more confident in an emergency.
FAQs About Changing Travel Trailer Tires
Q: Can I use my car’s jack to change my travel trailer tire?
A: It’s not recommended. Car jacks are generally not designed for the weight of a travel trailer. It’s safer to use a jack specifically rated for your trailer’s weight.
Q: How often should I replace my travel trailer tires?
A: While there’s no hard and fast rule, most experts recommend replacing travel trailer tires every 3-5 years, regardless of mileage. Exposure to the elements, UV rays, and infrequent use can all contribute to tire degradation.
Q: What should I do with the flat tire?
A: Don’t leave your flat tire on the side of the road! Many service stations and tire shops will recycle or dispose of old tires.
 Checking Travel Trailer Tire Pressure
Hit the Road with Confidence!
Changing a tire on a travel trailer might seem daunting, but with a little preparation and the right knowledge, you can handle this roadside challenge like a pro. Remember, safety always comes first! Keep these tips handy, and you’ll be ready to tackle any flat tire situation and get back to enjoying the journey.
For more travel tips, tricks, and destination guides, be sure to explore TRAVELCAR.edu.vn. Safe travels!