Remember that epic road trip you always dreamed of, cruising down the Pacific Coast Highway with the wind in your hair and not a care in the world? Now, imagine that dream turning into a bumpy, swaying nightmare as your travel trailer dances behind you. A swaying trailer isn’t just uncomfortable; it can be downright dangerous.
That’s where sway bars come in. Installing a sway bar on your travel trailer can make all the difference, providing the stability you need for a safe and enjoyable journey. This guide will walk you through the process step-by-step, so you can hit the road with confidence.
Understanding Sway Bars and Why You Need Them
Before we dive into the installation process, let’s take a moment to understand what sway bars are and why they’re crucial for travel trailer safety. Imagine driving through a gusty mountain pass or encountering a crosswind on the open highway. These forces can push your trailer, causing it to sway back and forth.
A sway bar, also known as a stabilizer bar, is a simple yet ingenious device that helps counteract these forces. It’s a metal bar that connects to both sides of your trailer’s axle and acts like a spring, resisting the twisting motion that leads to sway.
Benefits of Installing a Sway Bar:
- Increased Stability: Say goodbye to the white-knuckle experience of a swaying trailer. Sway bars help keep your trailer stable, especially in windy conditions or when passing large vehicles.
- Improved Safety: By reducing sway, you gain better control over your rig, reducing the risk of accidents caused by trailer instability.
- Enhanced Towing Experience: A stable trailer translates to a smoother, more comfortable ride for you and your passengers.
Choosing the Right Sway Bar
Not all sway bars are created equal. The right one for you depends on your travel trailer’s weight and size.
- Weight Distribution Hitch with Integrated Sway Control: For heavier trailers, a weight distribution hitch with built-in sway control is the gold standard. This system not only helps with sway but also distributes the trailer’s weight evenly across the tow vehicle’s axles.
- Friction Sway Control: Friction sway control is a more affordable option, using friction pads to resist sway. It’s generally suitable for lighter trailers.
When selecting a sway bar, consult your trailer’s owner’s manual or a trusted RV dealer to determine the appropriate weight capacity and type for your specific setup.
Tools and Materials You’ll Need
Before you begin, gather the following tools and materials:
- Sway bar kit: This should include all the necessary hardware, such as brackets, bolts, and the sway bar itself.
- Torque wrench: Essential for tightening bolts to the correct specifications.
- Socket set: For attaching the sway bar brackets.
- Drill and drill bits: In some cases, you may need to drill holes for mounting brackets.
- Level: To ensure the sway bar is installed correctly.
- Safety glasses and gloves: Always prioritize safety!
Step-by-Step Installation Guide
Now, let’s get down to business and install that sway bar!
1. Park on Level Ground: Find a flat, level surface to park your trailer and tow vehicle. This ensures accurate measurements and a proper installation.
2. Consult the Instructions: Every sway bar kit is different, so carefully read the manufacturer’s instructions specific to your model.
3. Attach the Brackets: The brackets will be mounted to your trailer’s frame near the axle. You may need to drill holes if your trailer doesn’t have pre-drilled mounting points. Use the provided bolts and the torque wrench to tighten them to the manufacturer’s specifications.
4. Attach the Sway Bar: Slide the sway bar through the brackets and secure it with the provided pins or bolts.
5. Adjust the Tension: Most sway bars have an adjustment mechanism to fine-tune the tension. You want it tight enough to control sway but not so tight that it restricts the trailer’s movement.
6. Test Your Setup: Before hitting the road, double-check all connections to ensure they are secure. Take your trailer for a short test drive, paying attention to how it handles in turns and when encountering crosswinds.
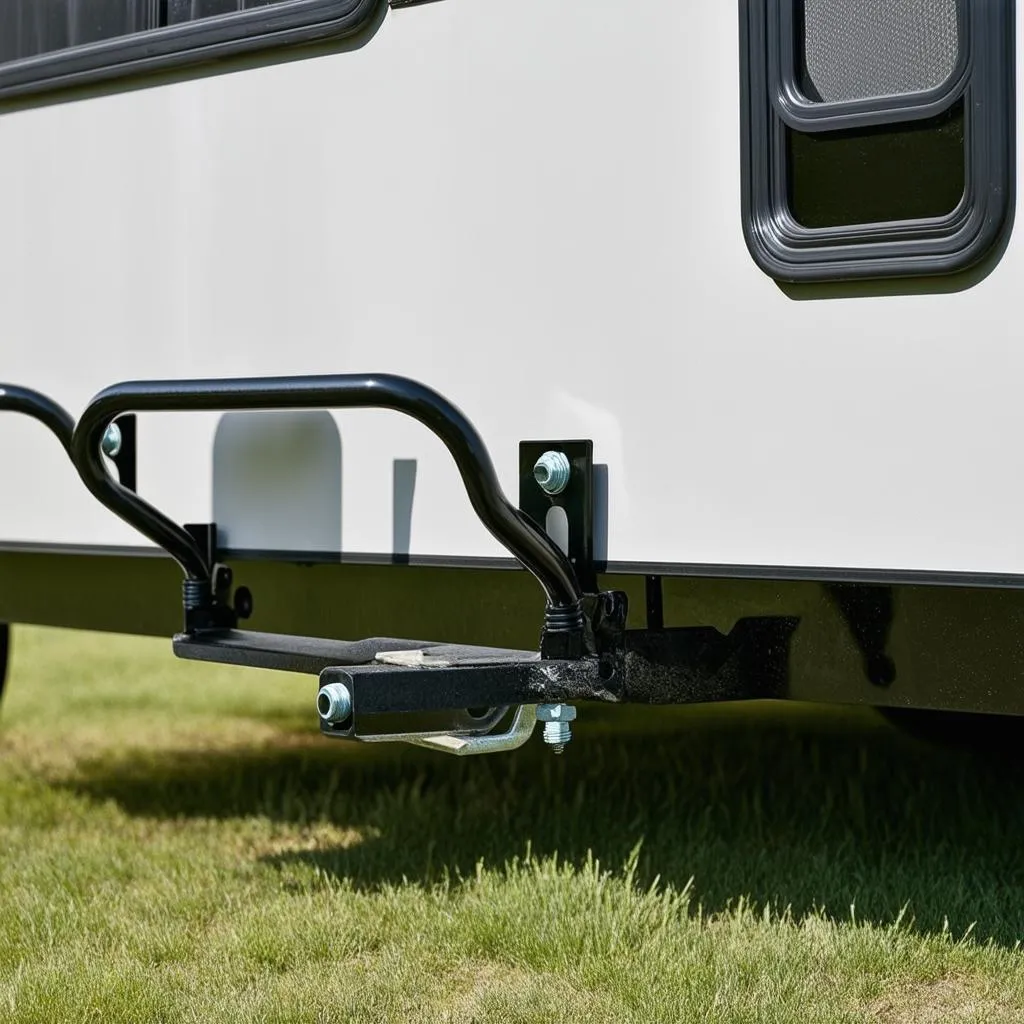 Sway Bar Installation
Tips for a Smooth Installation:
- Enlist a Helper: An extra set of hands can make the installation process much smoother, especially when lifting and maneuvering the sway bar.
- Measure Twice, Drill Once: If you need to drill holes, double-check your measurements to avoid costly mistakes.
- Don’t Overtighten: Use a torque wrench to ensure bolts are tightened to the correct specifications. Overtightening can damage the trailer frame or the sway bar itself.
Maintaining Your Sway Bar
Once installed, your sway bar requires minimal maintenance, but it’s essential to keep it in good working order.
- Regular Inspection: Check the sway bar and its components regularly for signs of wear and tear, such as rust, loose bolts, or damaged brackets.
- Lubrication: Apply lubricant to the sway bar’s moving parts, such as the friction pads or ball joints, according to the manufacturer’s recommendations.
FAQs About Sway Bars for Travel Trailers
Do I need a sway bar for my travel trailer?
While not legally required in all states, sway bars are highly recommended for most travel trailers, especially those over 2,000 pounds. They significantly enhance stability and safety, making a noticeable difference in your towing experience.
Can I install a sway bar myself, or should I hire a professional?
Installing a sway bar is a relatively straightforward process that many DIY enthusiasts can handle. However, if you’re not comfortable working with tools or unsure about any aspect of the installation, it’s best to seek assistance from a qualified RV technician.
How often should I replace my sway bar?
With proper maintenance, a sway bar can last for many years. However, it’s a good practice to inspect it regularly and replace it if you notice any signs of wear or damage.
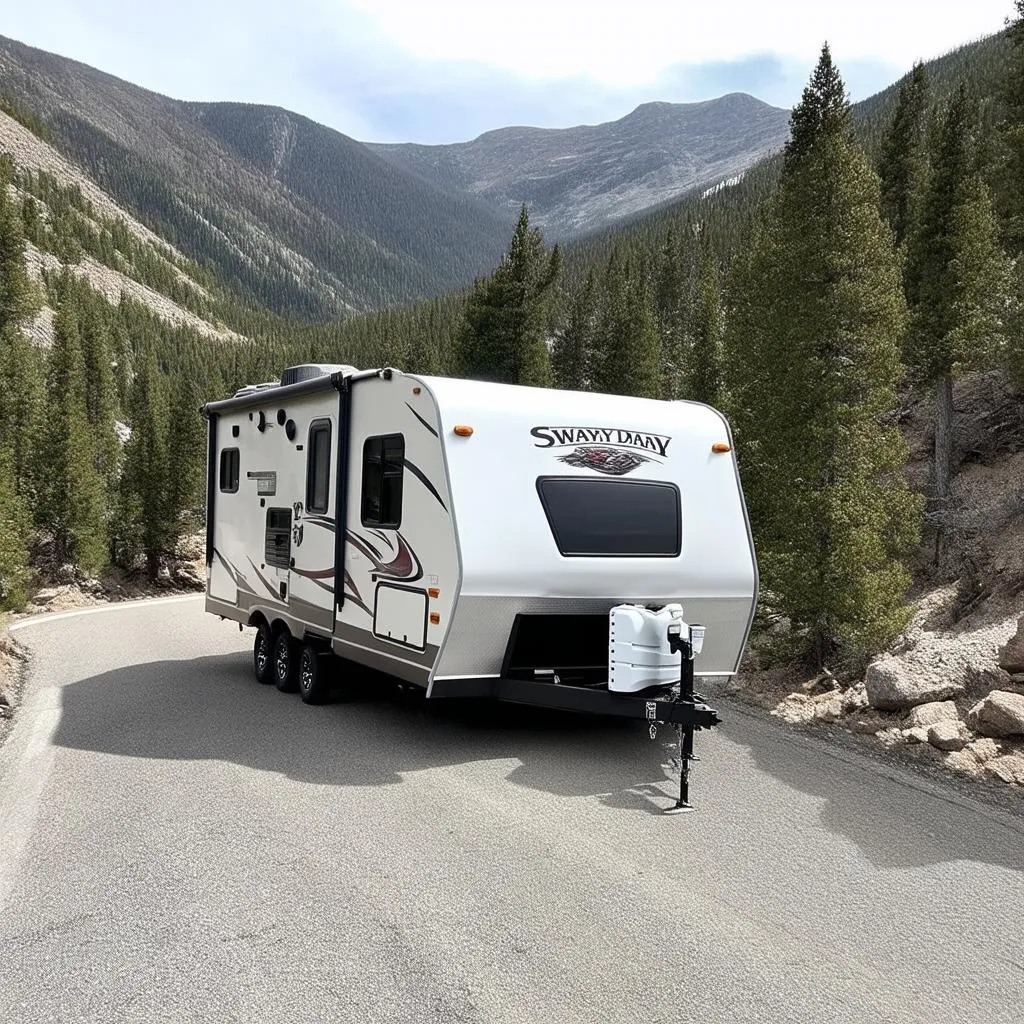 Travel Trailer on Mountain Road
Explore the Open Road with Confidence
Investing in a sway bar for your travel trailer is an investment in your safety and peace of mind. By following these installation steps and performing regular maintenance, you can enjoy countless miles of smooth, worry-free adventures. Remember, the open road awaits, and with a stable trailer, you’ll be ready to embrace every turn.
For more tips and advice on all things travel trailer-related, be sure to visit us at TRAVELCAR.edu.vn. Safe travels!