Have you ever snapped a photo in the heart of Hanoi’s bustling Old Quarter, only to find it looks a tad duller than the vibrant scene you remember? Perhaps the mystical shadows of the Temple of Literature concealed the intricate details in your picture. Don’t fret! Just like a skilled artisan can breathe life into a piece of lacquerware, you can illuminate your photos with a touch of Photoshop magic.
Understanding Brightness and Why It Matters
Think of brightness as the soul of your image. It dictates how much light shines through, influencing the overall mood and visibility of details. A well-lit photo can transport you back to the sun-drenched shores of Hoan Kiem Lake, while a dimly lit one might leave you feeling like you’re lost in the city’s captivating, yet sometimes shadowy, alleys.
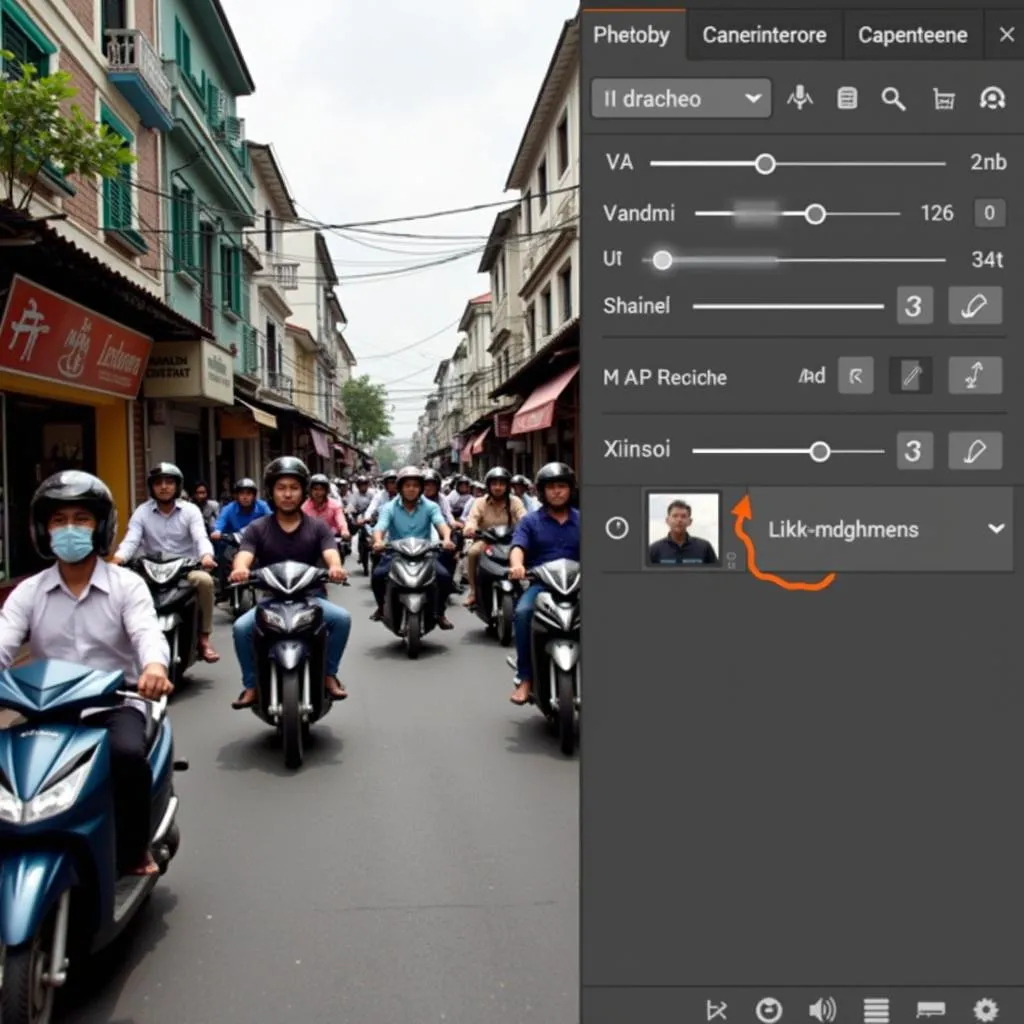 Adjusting Brightness Slider in Photoshop
But brightness isn’t just about making things brighter. Sometimes, you might want to embrace the mystery of a darker image, just like the ancient secrets hidden within the walls of the Hanoi Citadel. It’s all about finding the perfect balance to tell your story.
Illuminating Your Photos: A Step-by-Step Guide
Ready to unleash the power of light? Here’s how to adjust brightness in Photoshop like a pro:
1. Open Your Image:
Begin your creative journey by launching Photoshop and opening the image that needs a touch of brilliance. Imagine it’s a photo of you enjoying a traditional Bia Hoi on a lively street in the Ba Dinh district.
2. Navigate to Brightness/Contrast:
Go to “Image” in the top menu, hover over “Adjustments,” and select “Brightness/Contrast.” This tool is your magic wand for manipulating light.
3. Adjust the Brightness Slider:
A dialog box will appear with a slider labeled “Brightness.” Move it to the right to brighten your image, revealing the intricate details of the Bia Hoi scene, or to the left to darken it, adding an air of mystery.
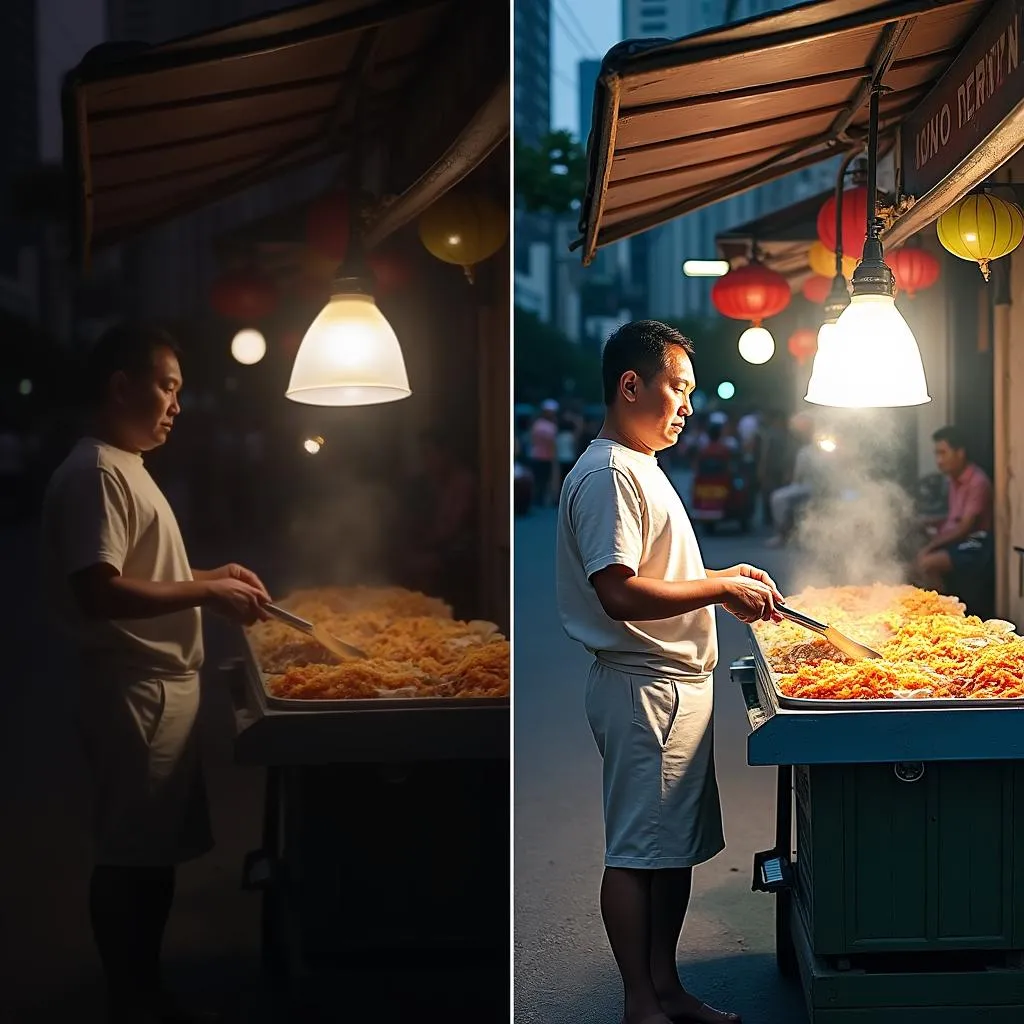 Before and After Brightness Adjustment
4. Fine-Tune with Contrast:
Contrast works in harmony with brightness. It controls the difference between the light and dark areas in your photo. A touch of contrast can make those delicious street food colors in your photo pop.
5. Preview and Adjust:
Remember, photography is an art form. Don’t be afraid to experiment! Play with the sliders until your image captures the essence of your Hanoi adventure.
6. Save Your Masterpiece:
Once you’re satisfied with the illumination, save your image. You’ve successfully brought your Hanoi memories to life!
Beyond Brightness: Exploring Other Lighting Tools
Photoshop offers a treasure trove of tools to further enhance your images. Consider exploring:
- Levels: For fine-tuning the tonal range and distribution of light.
- Curves: To achieve advanced brightness and contrast adjustments.
- Exposure: To simulate the effect of changing the shutter speed on a camera.
Think of these tools as the vibrant spices used in Vietnamese cuisine—each one adding a unique flavor to your photographic masterpiece.
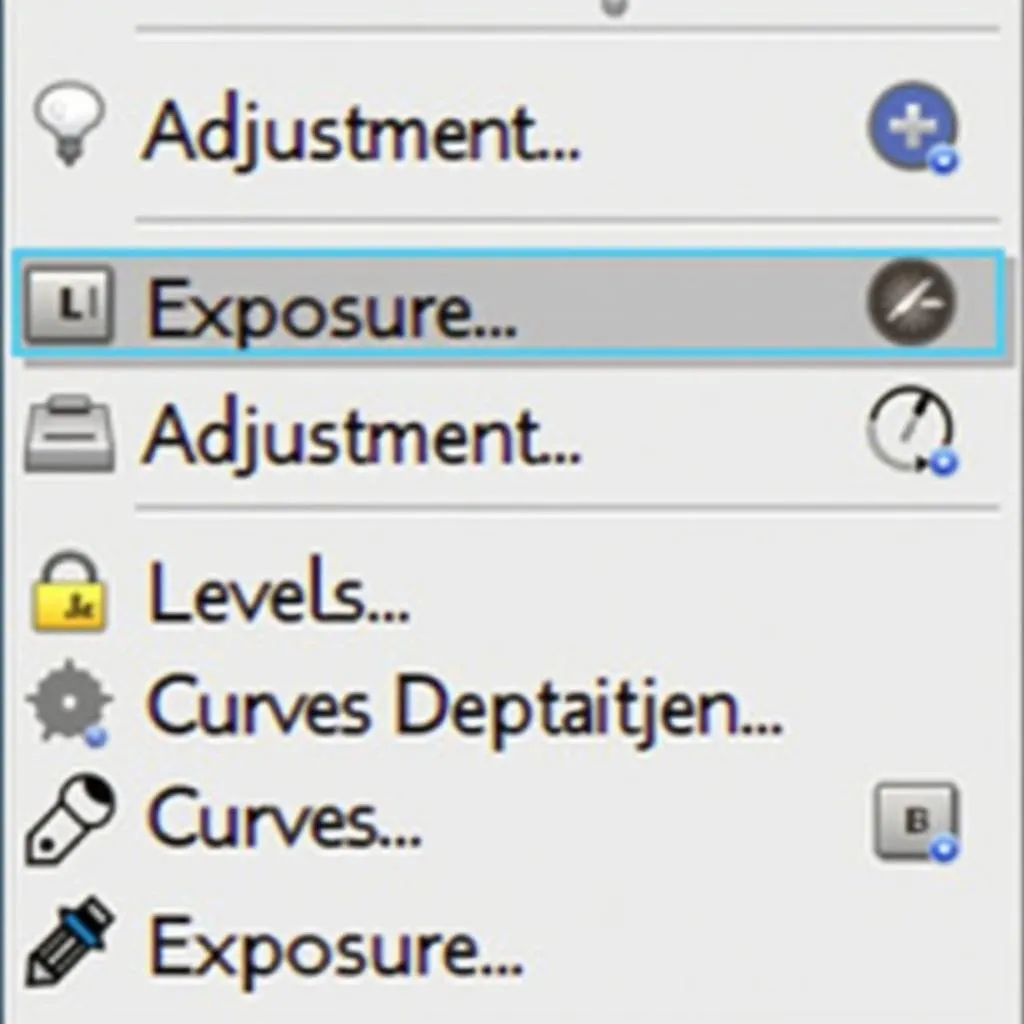 Photoshop Lighting Adjustment Tools
Need Help Capturing the Magic of Hanoi?
Ready to embark on your own Hanoi adventure? TRAVELCAR is here to make your journey unforgettable. Whether you need a spacious 16-seater van for your family, a comfortable 29-seater for your tour group, or a luxurious 45-seater bus for a grand excursion, we’ve got you covered. Our reliable airport transfers, chauffeured tours, and comfortable vehicles will allow you to explore Hanoi’s hidden gems without a worry.
Contact us at 0372960696 or [email protected]. Our office is conveniently located at 260 Cầu Giấy, Hà Nội. Let us illuminate your travel experience!
Looking for more photography tips or travel inspiration? Check out these articles on our blog:
- [Mastering the Art of Street Photography in Hanoi’s Old Quarter]
- [Unveiling the Hidden Gems of Vietnamese Cuisine: A Foodie’s Guide]
We’d love to hear about your adventures! Share your Hanoi travel photos and Photoshop tips in the comments below.